- Published on
How to Add Multiple Product Images in CSV File
- Author
- Name
- khoa
If you want to add multiple product images from your CSV file, you can upload it to your Shopify admin page. Because we are learning the way to import products to the store with a CSV file, there will have some things that you might need to understand.
Firstly, Shopify recommends that shop owners should view and edit their formatted CSV files on Google Sheets.
Secondly, a CSV file cannot contain anything but text, so if you want to import images, you will use the URLs link of those images. And the best way to get the link is to upload that image to Shopify, and the URLs will be generated automatically.
So I will share with you the steps to help you in the adding multiple images process.
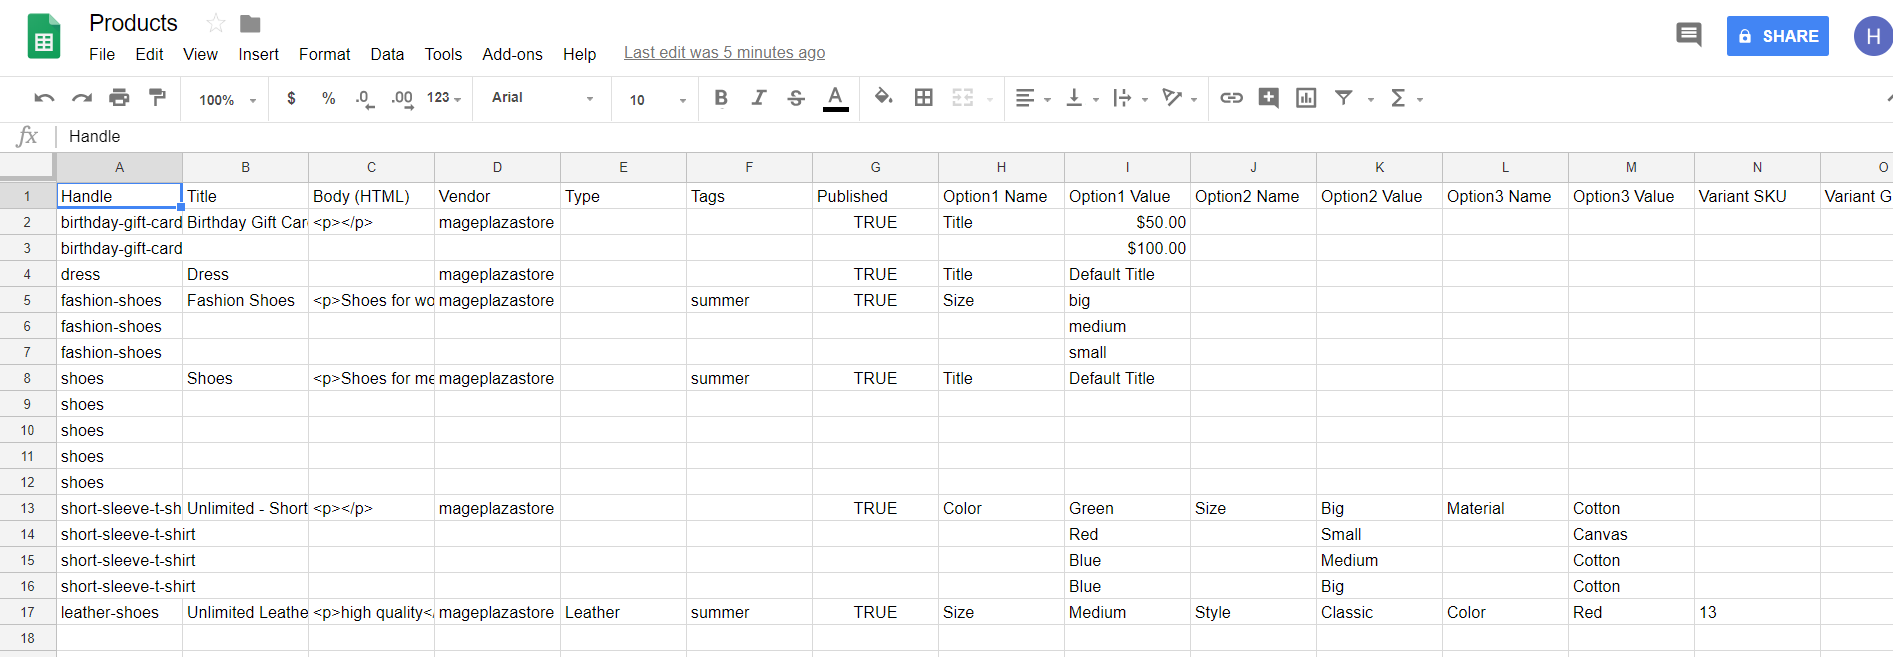
To Add multiple product images to a CSV file:
To be able to add multiple images to your CSV file you will need to go through the process which includes three steps:
Step 1: Insert new rows
Step 1.1: Open CSV file
You need to import and open your CSV file with Google Sheets.
Step 1.2: Choose Product
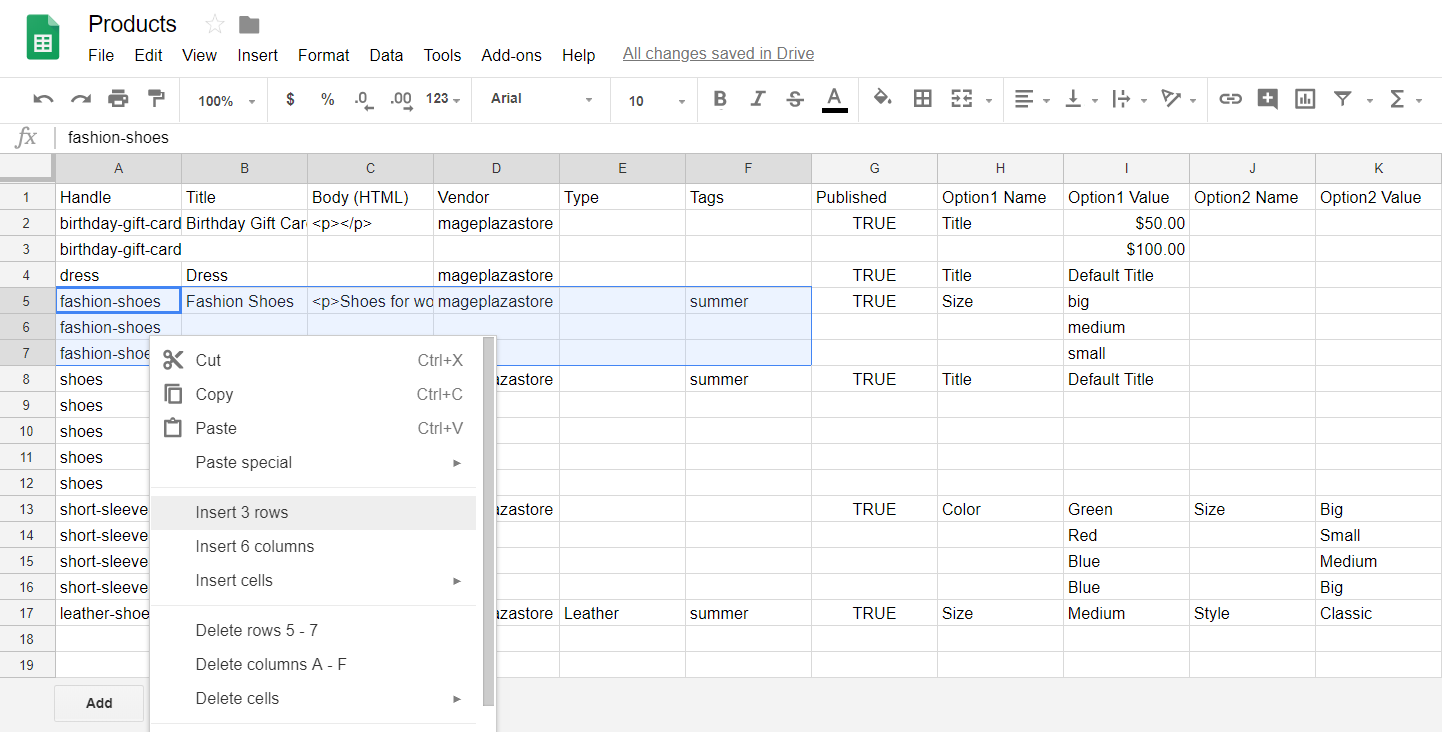
Choose the product which you want to add product images in this file. For example, I choose Dress to add pictures. And I want to add three more images.
Step 1.3: Insert row
I select row number 5, 6, and 7. Afterward, click the right mouse button and you will see a drop-down list. Chose Insert 3 rows to add 3 new rows under the fourth line.
Step 2: To Copy + Paste the Handle
Step 2.1. Copy
You will need to copy the “Handle” of the fourth row.
Step 2.2: Paste
Paste it to the “Handle” column of 3 new rows you have just added.

Step 3: Copy + Paste the Image URLs
Step 3.1: Upload images
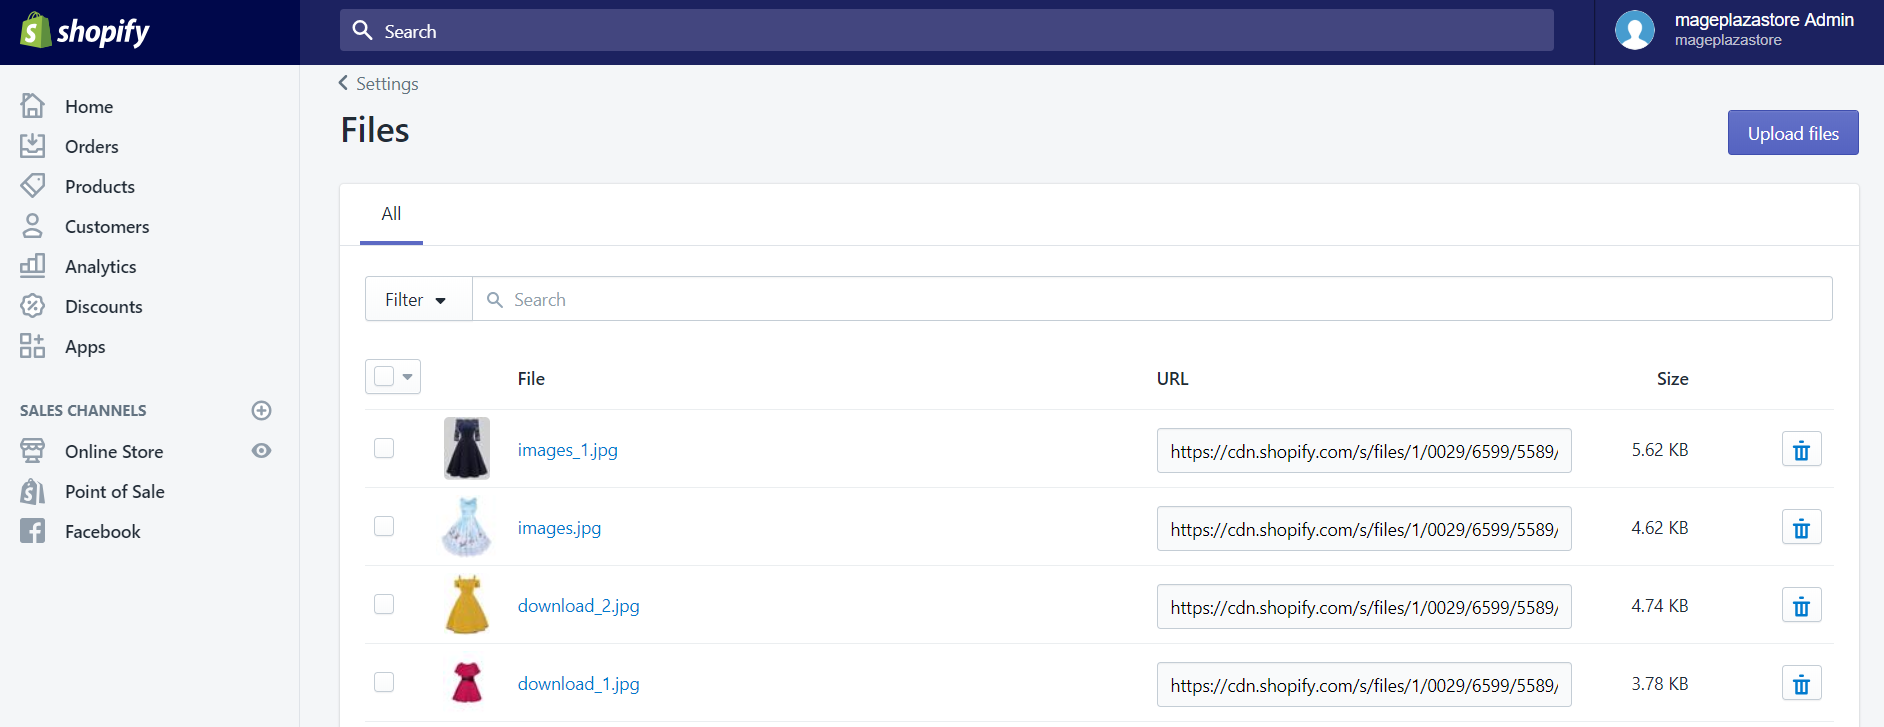
You will need to upload your images to Shopify. I have just shared about this above.
- From your Shopify admin, go to the
Settingsection.
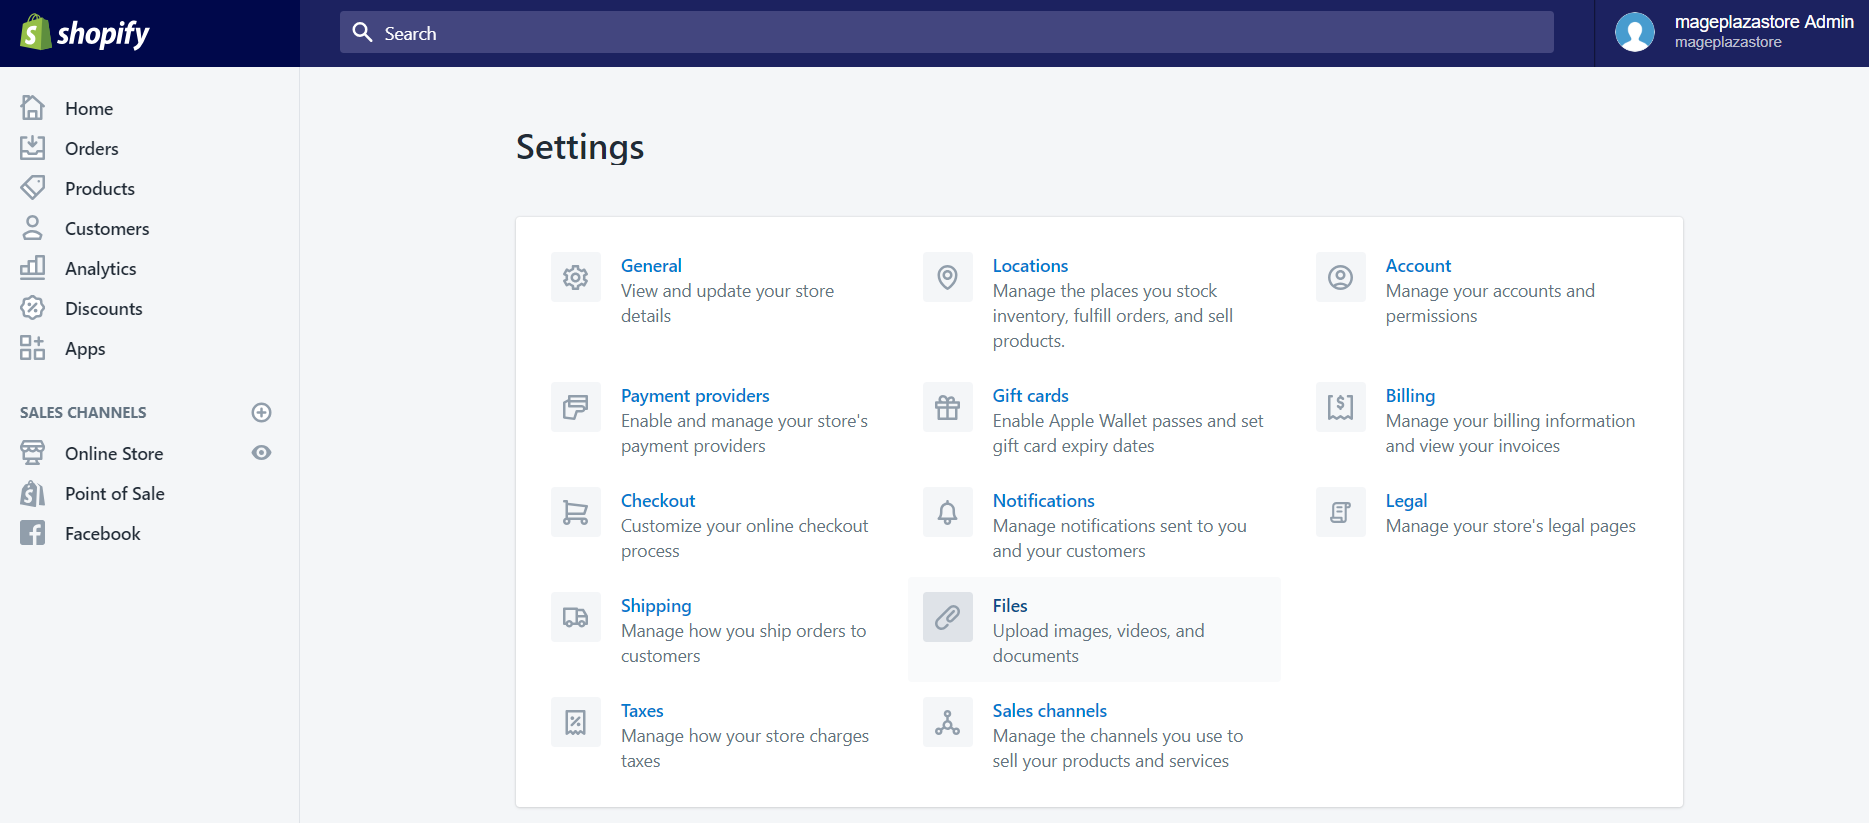
-
Then, you need to find and select the files section.
-
Next, click on the
Upload filesbutton to select the images which you want to add in your desktop
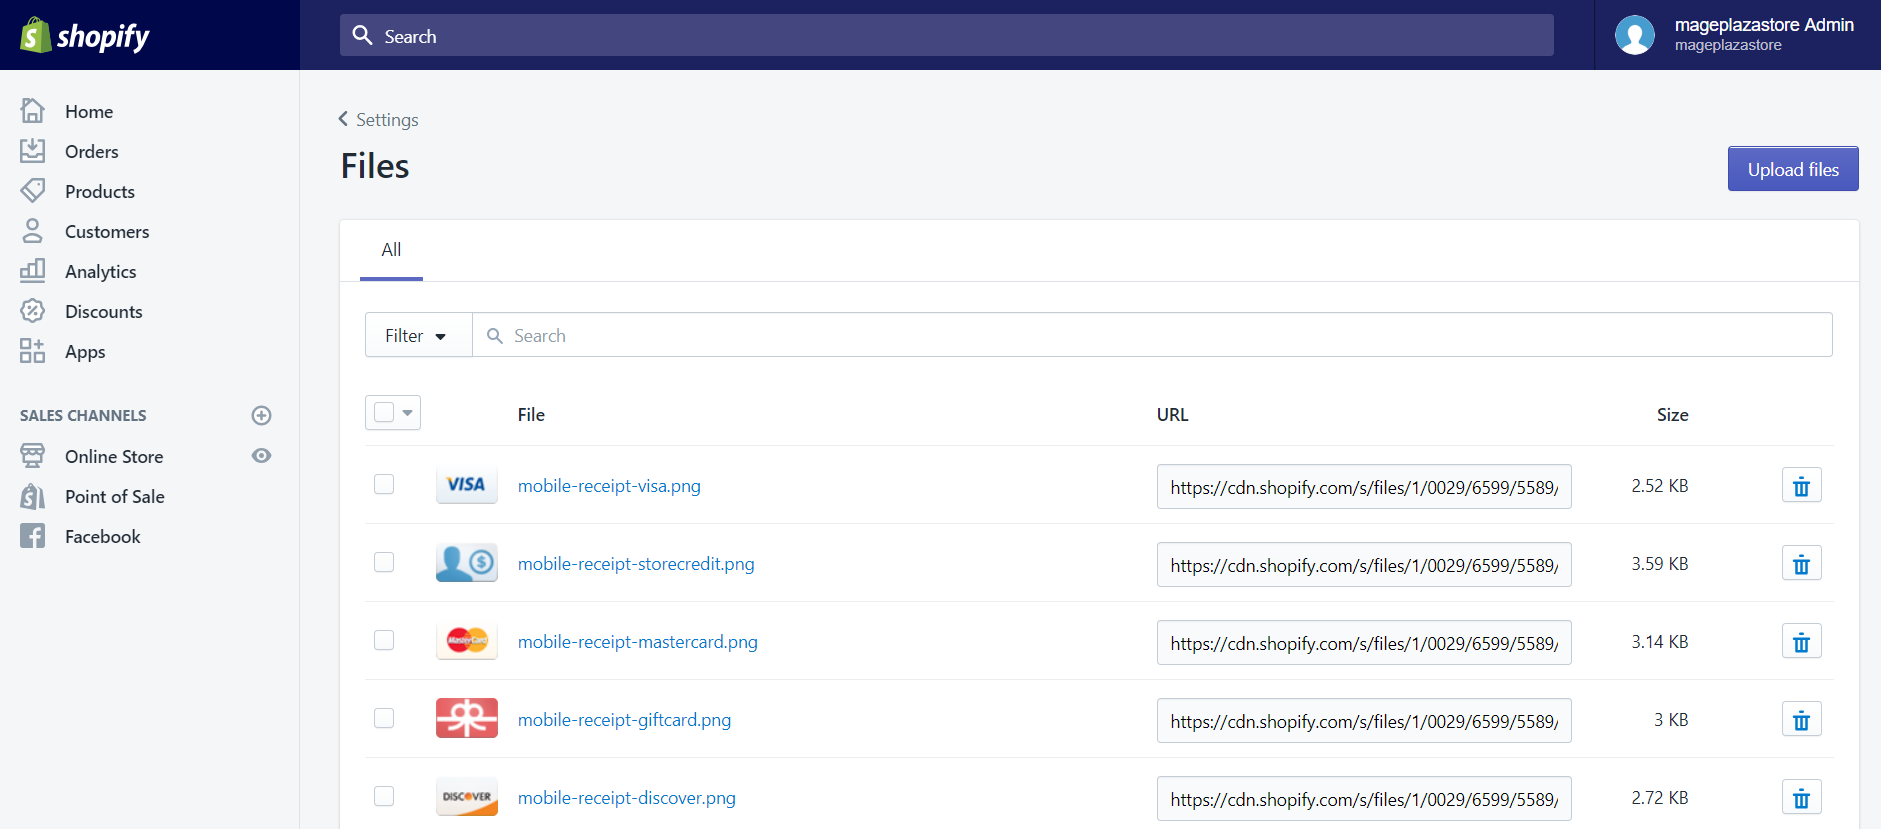
- After you have uploaded all the images, their
URLswill appear in the URL column.
Step 3.2: Copy link
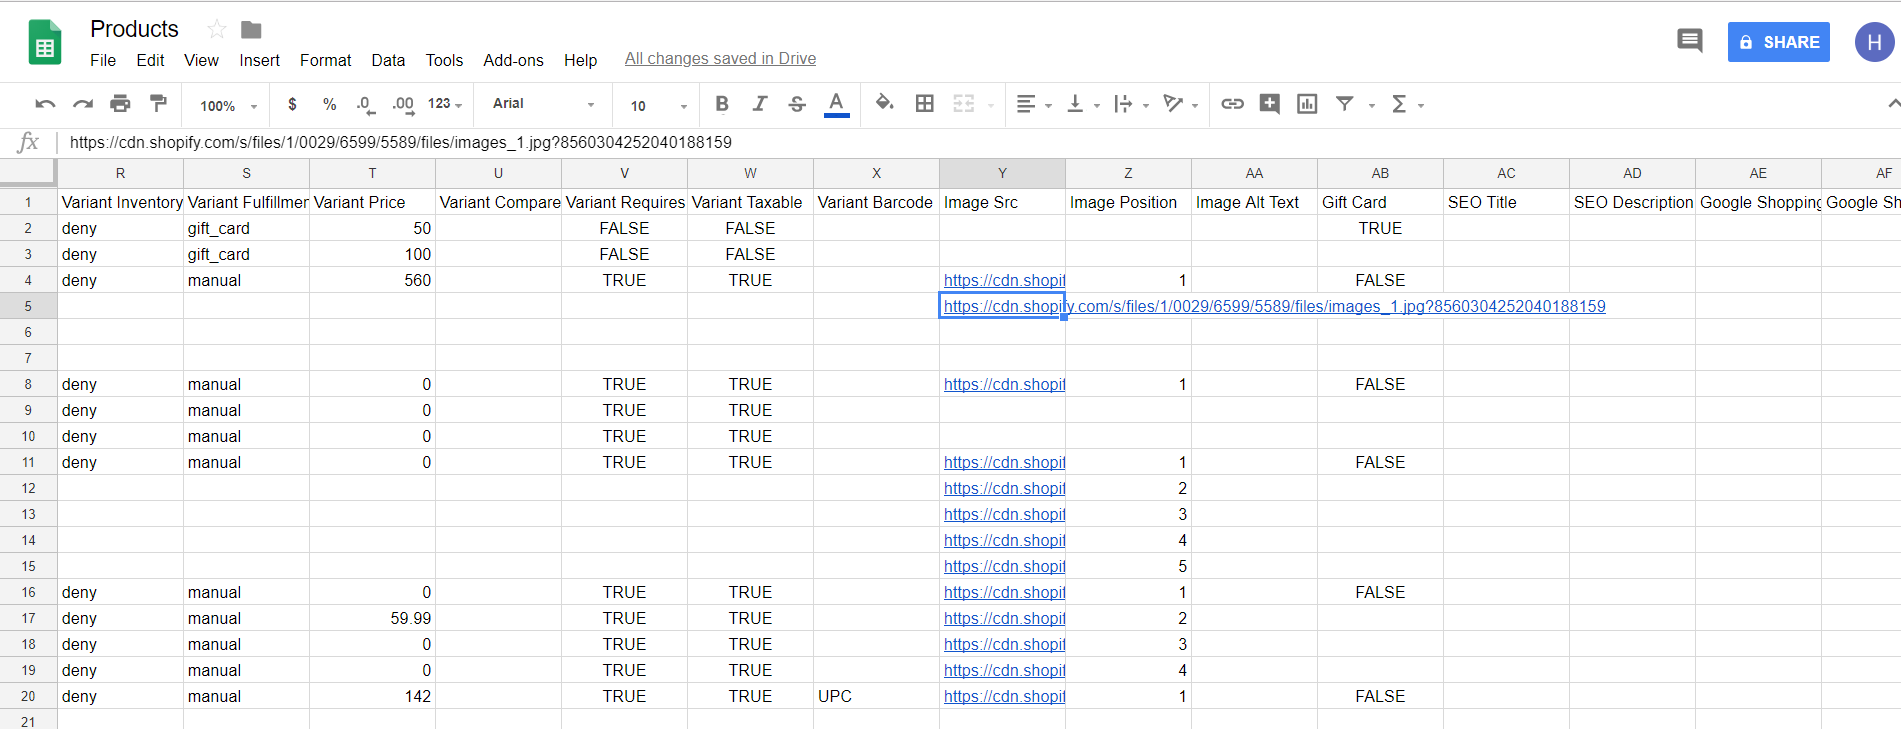
After that, you will need to copy the link in the URL column. You can only copy one link at a time.

Step 3.3: Paste link
Drag the horizontal bar to the right, and you will see the Image Src column. Once you see that column, paste the URL link you have copied to each line.
After you have finished all the stages above, you need to save the file and then import it to Shopify.
Conclusion
Above is a step-by-step tutorial on how to add multiple product images to a CSV file on Shopify. I hope that this instruction could make it easier for you to use the CSV files. If you enjoy this posts and want more similar instructions, check out our Shopify Tutorials.