- Published on
Buy Shipping Label
- Author
- Name
- Hanh
In this writing, these steps on how to buy a shipping label on Shopify on Desktop, iPhone, and Android. As you use the Shopify Shipping, you had better buy the shipping labels when an order is fulfilled in your Shopify admin or on its app. In fact, the cost of purchasing a shipping label depends on the rates given by Canada or USPS Post.
Related Posts:
- How to Set Your Products to be Fulfilled by Your Custom Service
- How to Void a Shipping Label
- How to Buy and Print Multiple Shipping Labels
- Print a Shipping Label on Shopify in 7 Simple Steps
- How to Change your Shipping Label Printer Settings on Shopify
How to buy a shipping label
- Step 1: Choose Orders
- Step 2: Select quantity of the order
- Step 3: Opt for Create shipping label
- Step 4: Confirm quantity of the items
- Step 5: Choose package and enter shipment's weight
- Step 6: Choose shipping method
- Step 7: Complete Customs declaration form
- Step 8: Check Signature required or Signature Confirmation
- Step 9: Set up shipping date
- Step 10: Agree with Shopify Shipping UPS Terms
- Step 11: Review shipping details
- Step 12: Print out customs form
Step 1: Choose Orders.
Choose Orders from the Shopify admin.
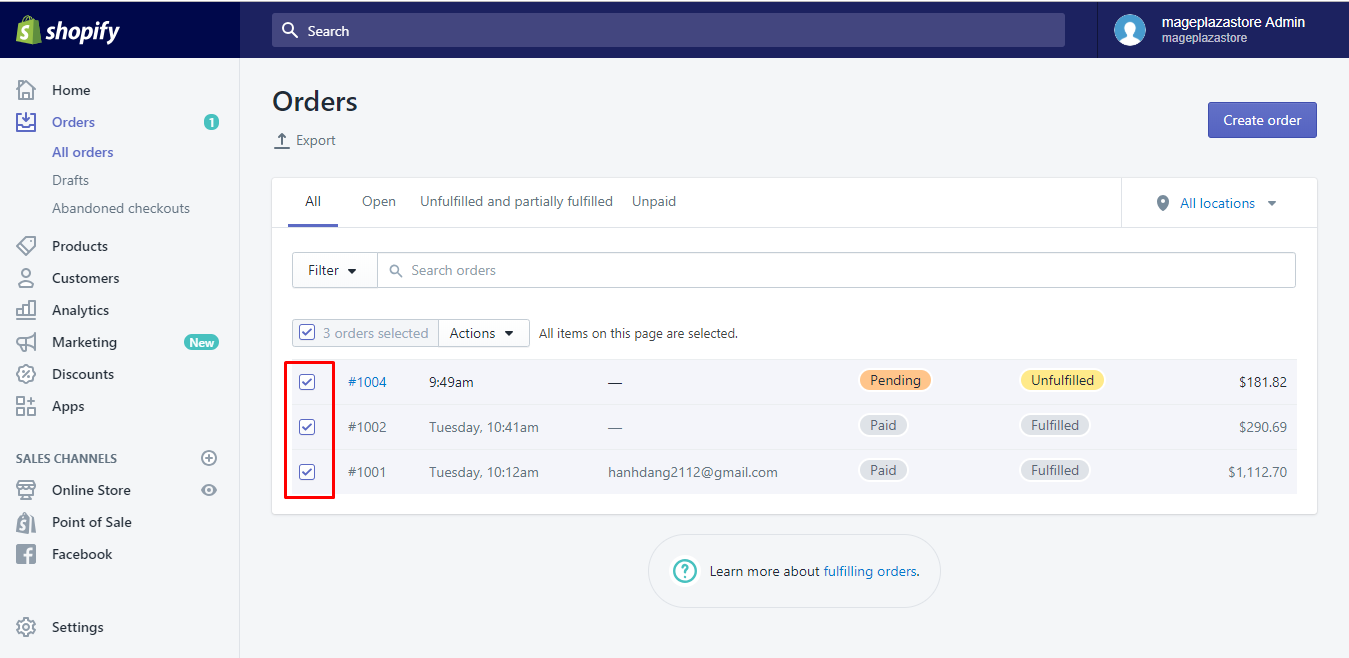
Step 2: Select quantity of the order.
Select the quantity of the order which wants to be fulfilled.
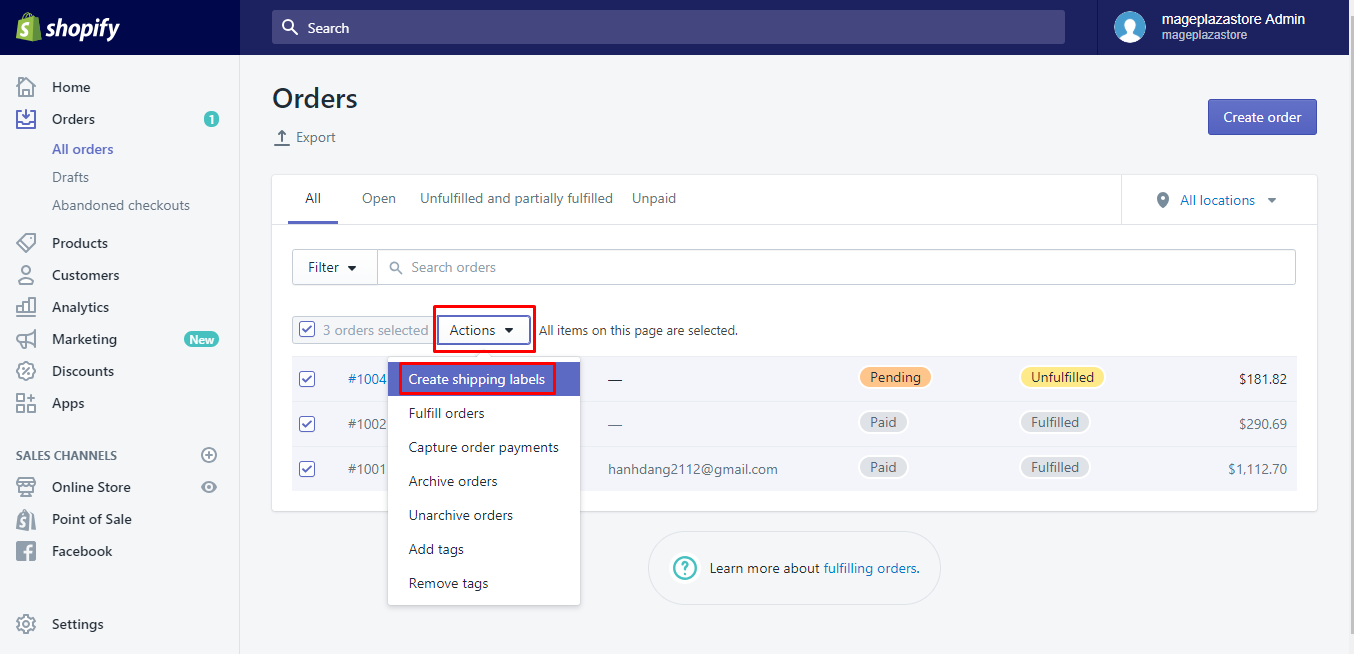
Step 3: Opt for Create shipping label.
Opt for Create shipping label at your Unfulfilled section.
Step 4: Confirm quantity of the items.
Confirm the quantity of the items you want to have them in the fulfillment in the Items section. In case you like to ship your customers’ orders using over a fulfillment, you can reduce the number of each item you might not want to ship to zero.
Step 5: Choose package and enter shipment's weight.
Choose a package at the Package drop-down list, and at the same time, enter the weight of the shipment at the Total weight box.
When you want to insert a new type of the package, you can select Add package. One more time, type your package’s information and choose Add package.
Step 6: Choose shipping method.
You can choose the shipping method from the Shipping Service section.
Step 7: Complete Customs declaration form.
Complete the Customs declaration form if you ship internationally.
Step 8: Check Signature required or Signature Confirmation.
You need to check the Signature required or Signature Confirmation if you use the Shopify Shipping with Canada or USPS Post.
Step 9: Set up shipping date.
You can set up your shipping date. The date can be printed off on your shipping label.
Step 10: Agree with Shopify Shipping UPS Terms.
Accepting the Shopify Shipping UPS Terms is a must.
Step 11: Review shipping details.
Before clicking Buy shipping label, you can review the shipping details from the Summary section. In addition, you need to ensure that the label form can be suitable for the print you are using. (If it is not, select Change to choose the proper format).
Step 12: Print out customs form.
When you are willing to ship the order, you are required to print the customs form and stick them outside of the package.
To buy a shipping label on iPhone (Click here)
-
Step 1: Touch Orders.
Touch
Ordersfrom your Shopify app at the bottom of the page. -
Step 2: Choose the number of orders.
Choose the number of orders you want to get them fulfilled.
-
Step 3: Touch Create shipping label.
Touch
Create shipping labelfromUnfulfilledsection.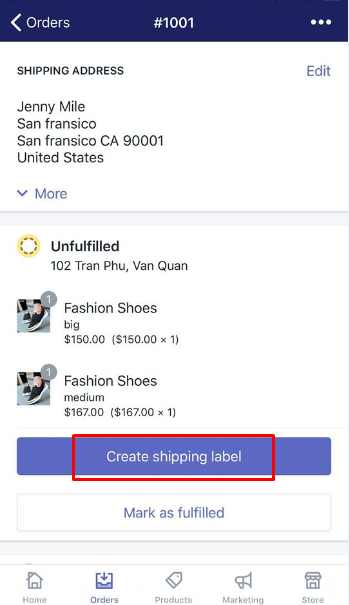
-
Step 4: Confirm the shipping address.
You need to confirm the shipping address of your customers. If you want to edit it, touch
Edit shipping addressto make change in the shipping address and the customer’s name.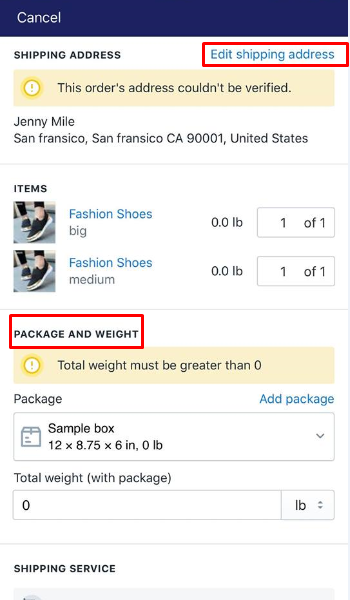
-
Step 5: Type the number of each item you want to have them.
Type the number of each item you want to have them. If not, all of your order’s items marked unfulfilled are consisted of in the fulfillment.
-
Step 6: Tap a package from the Package drop-down list.
Tap a package from the
Packagedrop-down list, then type the shipment’ weight from theTotal weightsection. PressAdd packageif you want to add a new one.
-
Step 7: Choose the shipping service.
Choose the shipping service in the
Shipping servicesection. -
Step 8: Touch Buy shipping label.
To buy a shipping label on Android (Click here)
-
Step 1: Touch Orders in your Shopify app.
-
Step 2: Touch order you want to get it fulfilled.
-
Step 3: Touch Create shipping label.
You can touch
Create shipping labelfrom theUnfulfilledarea. -
Step 4: Confirm again the address of your customer.
Confirm again your shipping address. If you want to change the address and name of customers, tap
Edit shipping address. -
Step 5: Type the number of items to be included in your shipment.
Type the number of items to be included in your shipment.
-
Step 6: Go to a package at the Package drop-down menu.
Go to and select a package at the
Packagedrop-down menu. Don’t forget to type your shipment’s weight at theTotal weightsection. In case you like to add a new one, then touchAdd packageand fill in your new package’s information. -
Step 7: Opt for a shipping service.
Opt for a shipping service from the
Shipping servicesection. -
Step 8: Choose Buy shipping label.
To complete your current work, tap
Buy shipping label.
Conclusion
As you can see, those above steps on how to buy a shipping label are not so difficult for you to manipulate. Take note that when you finish buying the shipping label, the cost will be sent to you via your account on Shopify. The whole price can be present on the bill and contain any possible fees and taxes.